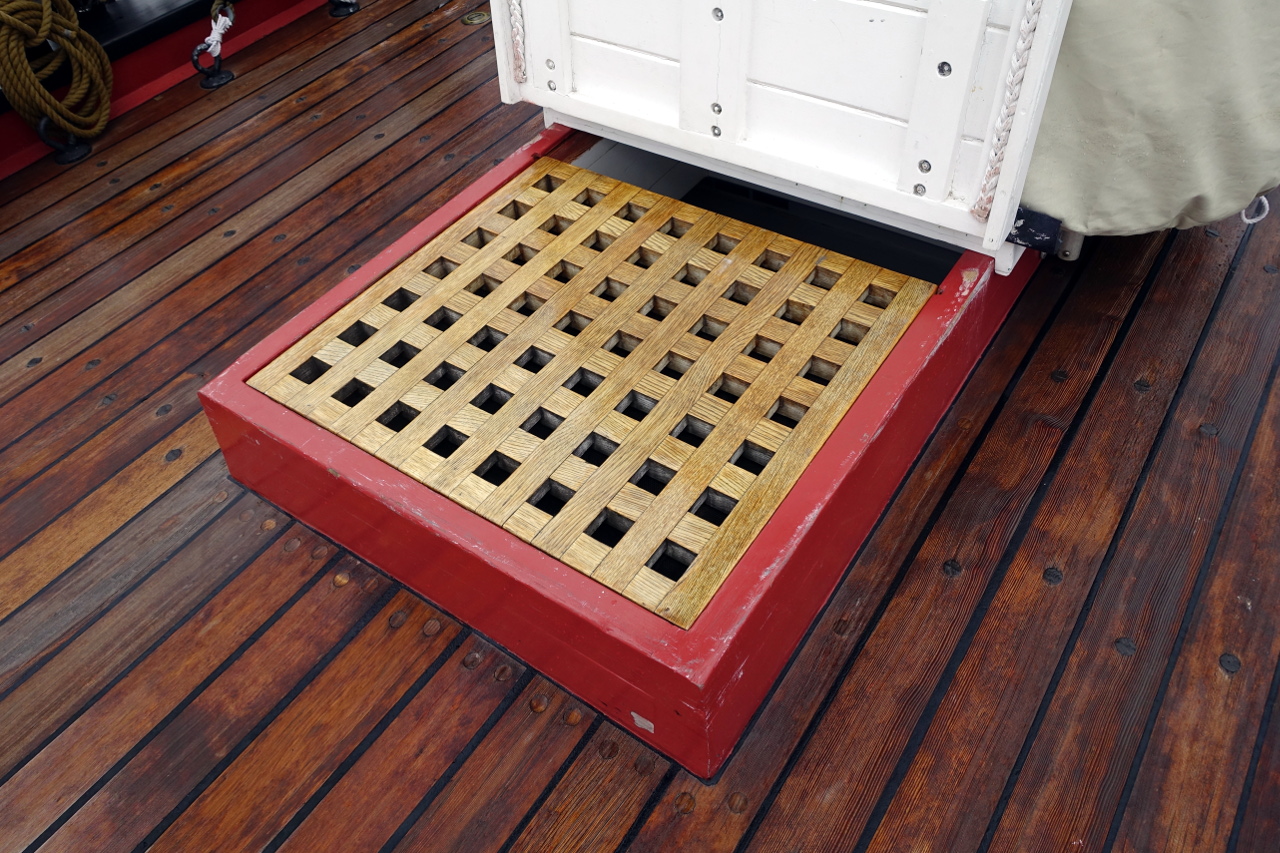
The Sultana has four hatches. Two are small: one is located aft of the windlass and the other is forward of the binnacle. A long, medium sized hatch is on the quarter deck, and will be open to expose the ladder on my model, as it is on other Sultana models. Finally, there is a large hatch on the main deck. Most models depict the main hatch covered with boards, but on the Sultana replica, the large hatch has grating and a ladder down.
The picture below is of the medium hatch, with the grating in place to cover the ladder. Note the white cover. All of the hatches on the Sultana have these covers, which keep out water. However, I think I will omit the white covers.
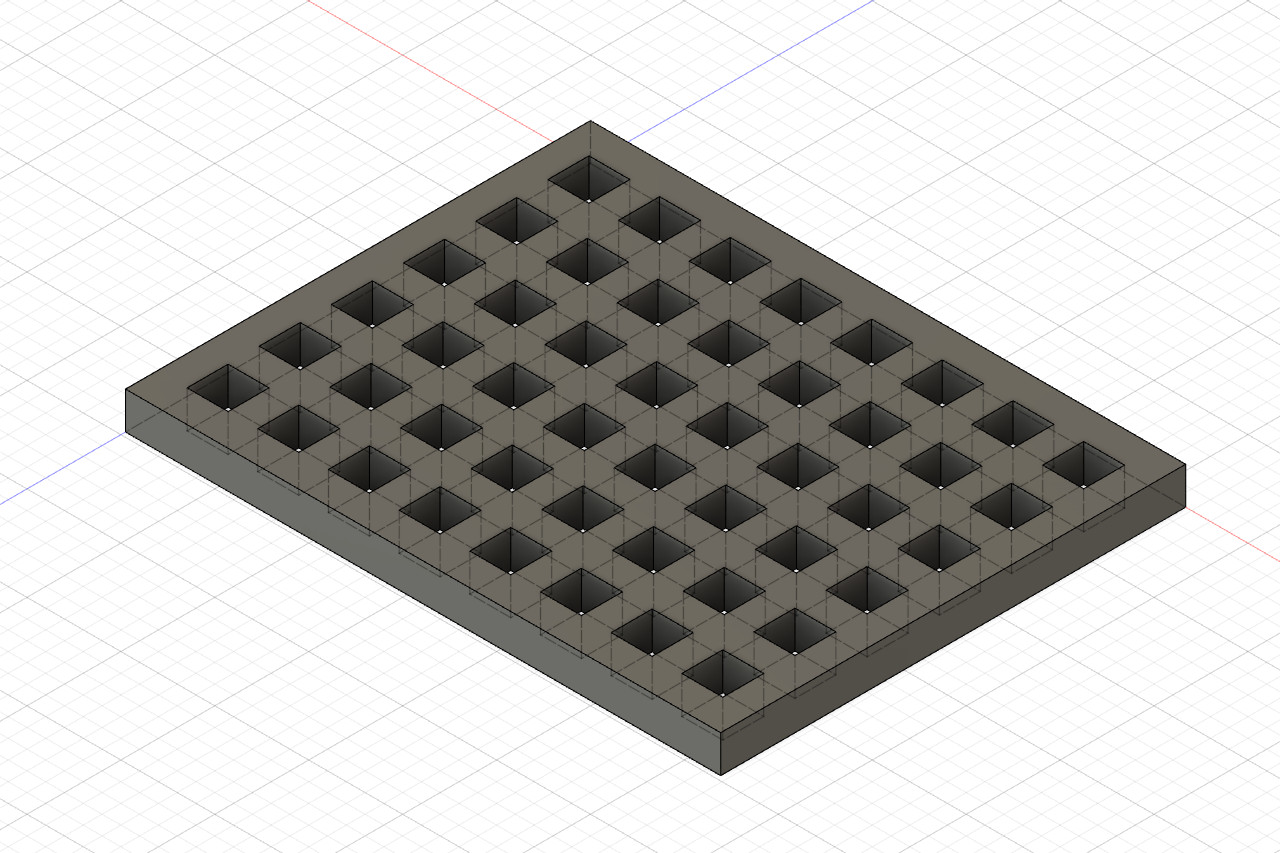
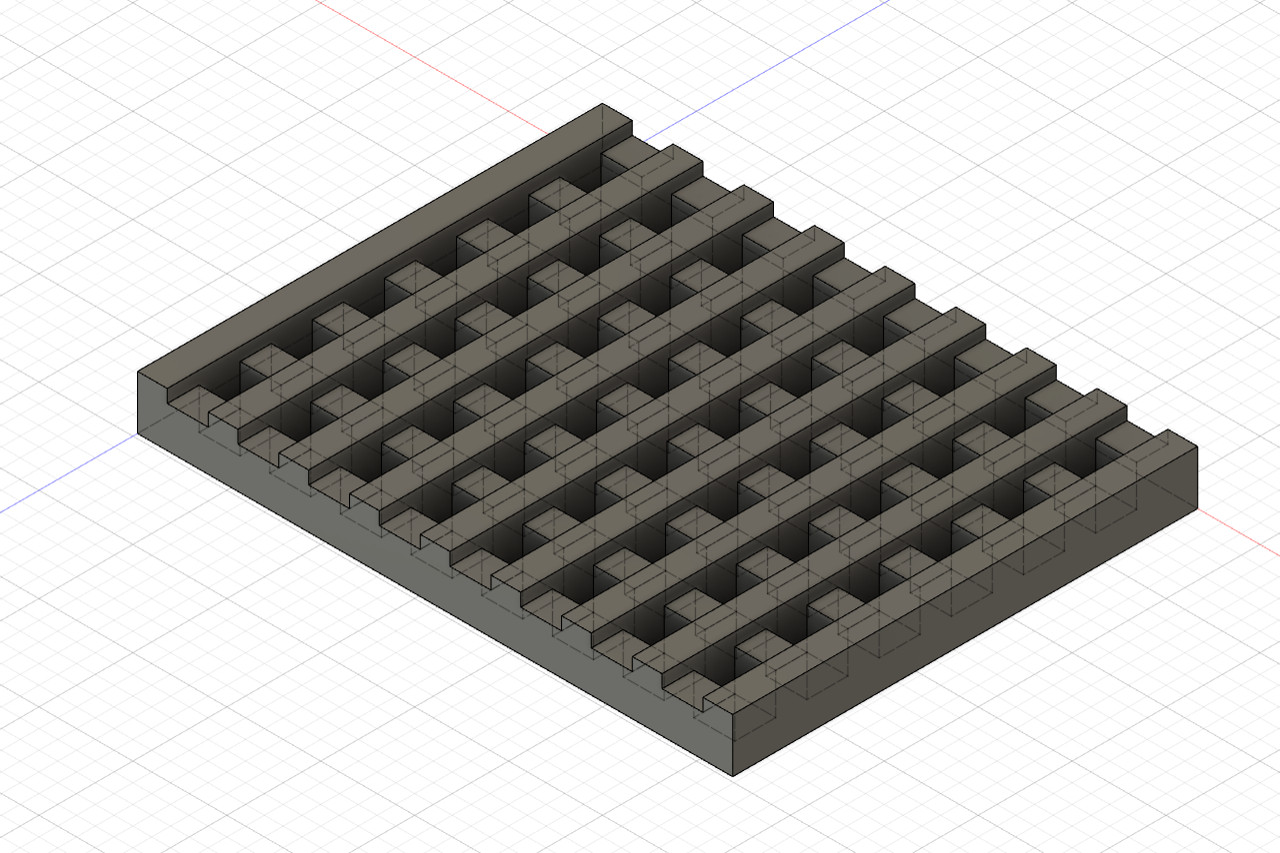
Creating a grating in Fusion 360 isn’t too hard. Draw a rectangle, draw one of the square holes, use a rectangular pattern to create the remaining holes, then extrude the sketch.
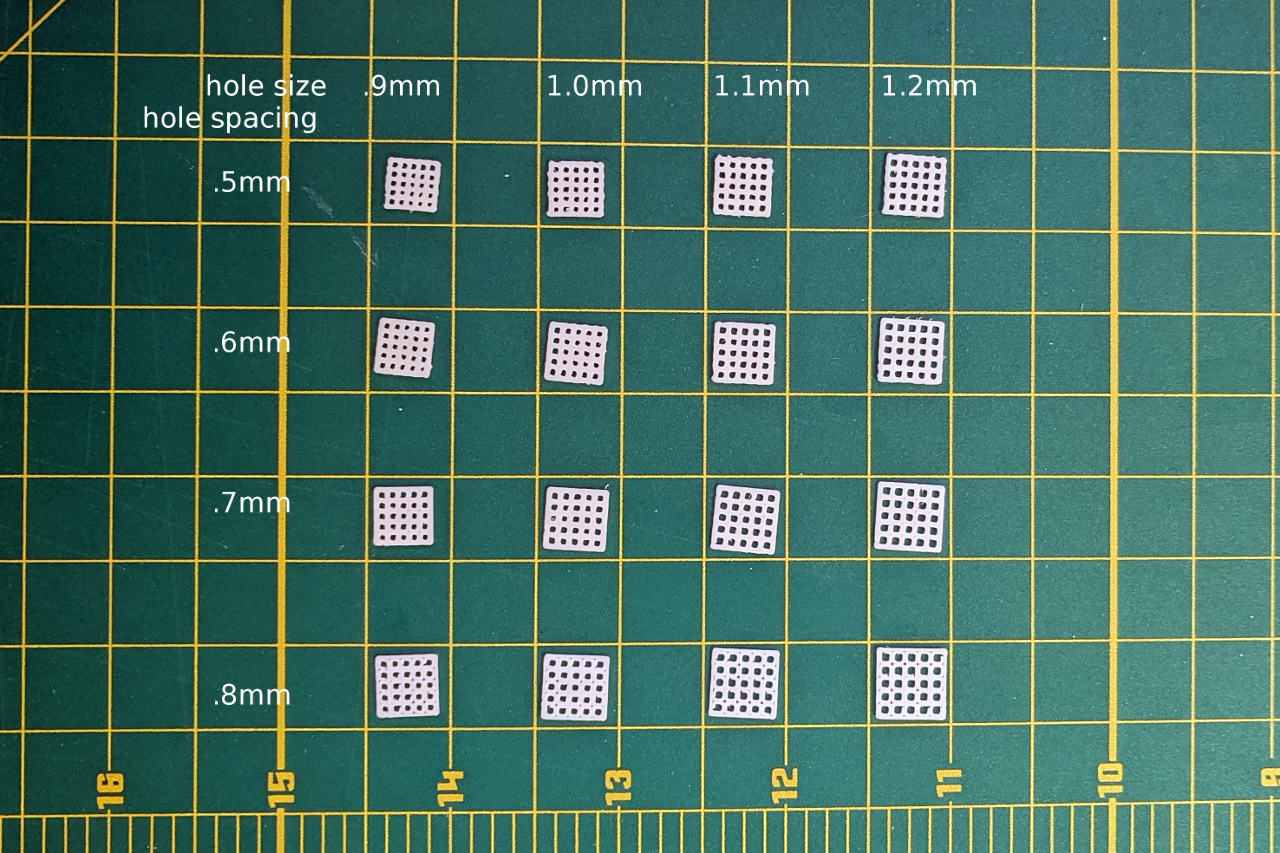
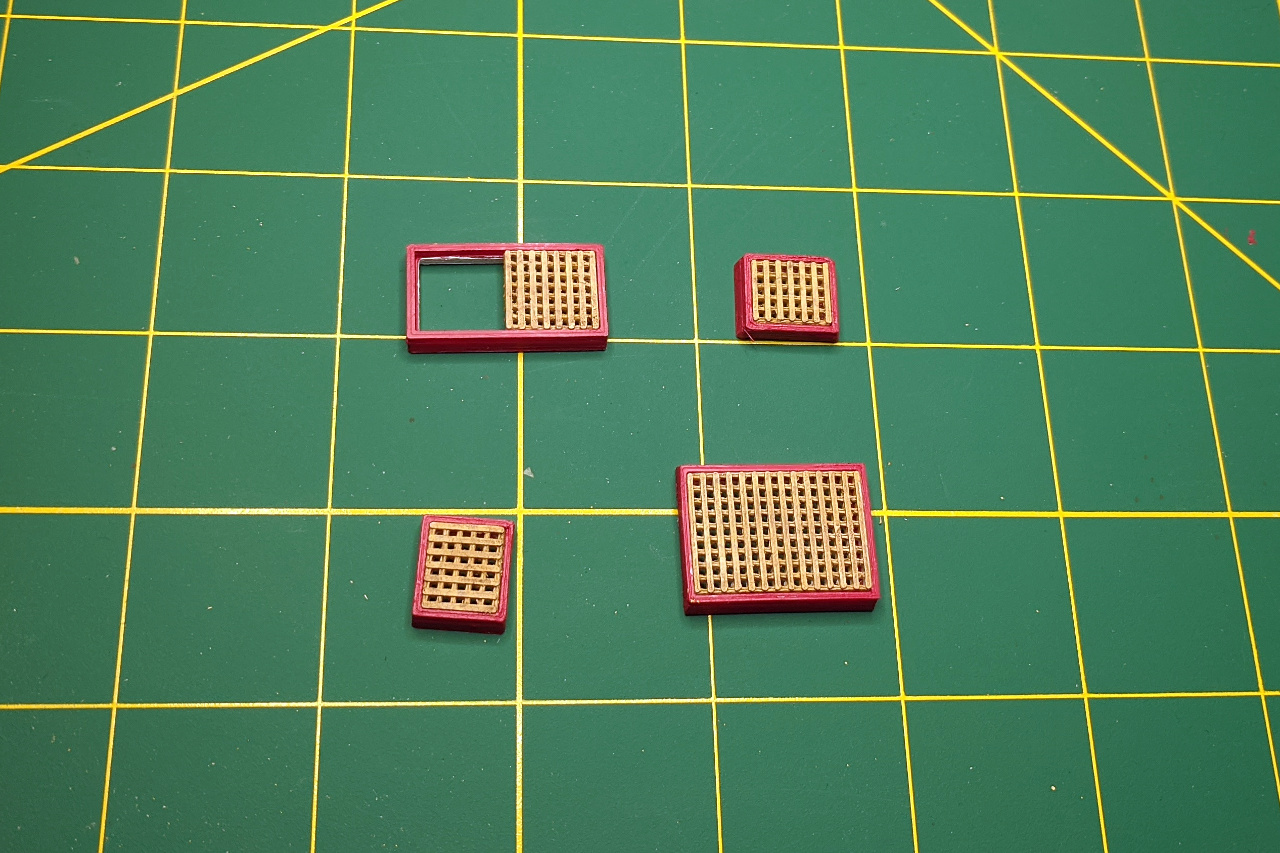
For the grating on the Sultana, I need to have the holes and space between holes at roughly .6mm in size. I ran an experiment to see how small I could make grating that still retained square-shaped holes. As you can see, the pieces in the lower right are acceptable, while the ones in the upper right are not. This shows the limits of what I can do with 3D printed grating.
After some experimentation, I found that having the surface raised in one direction makes the grating look better.
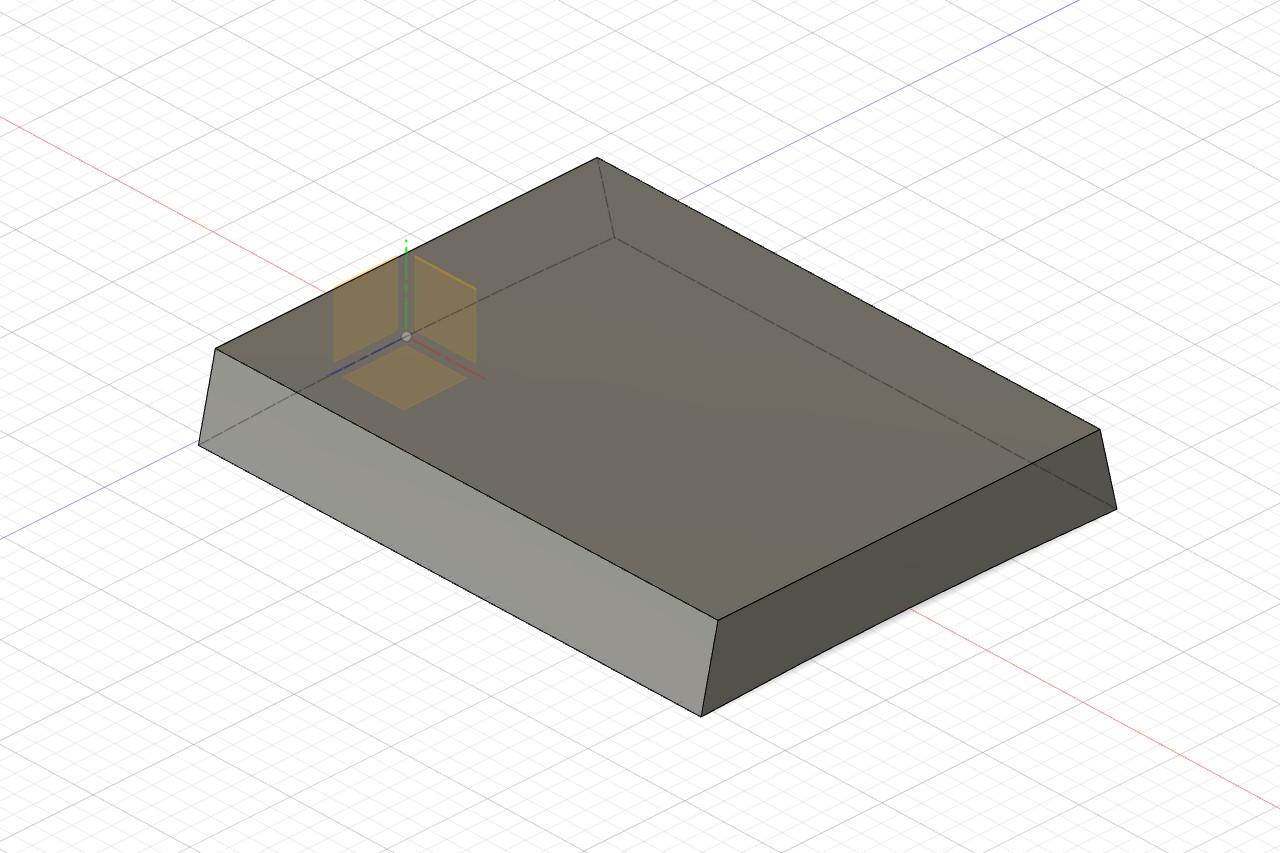
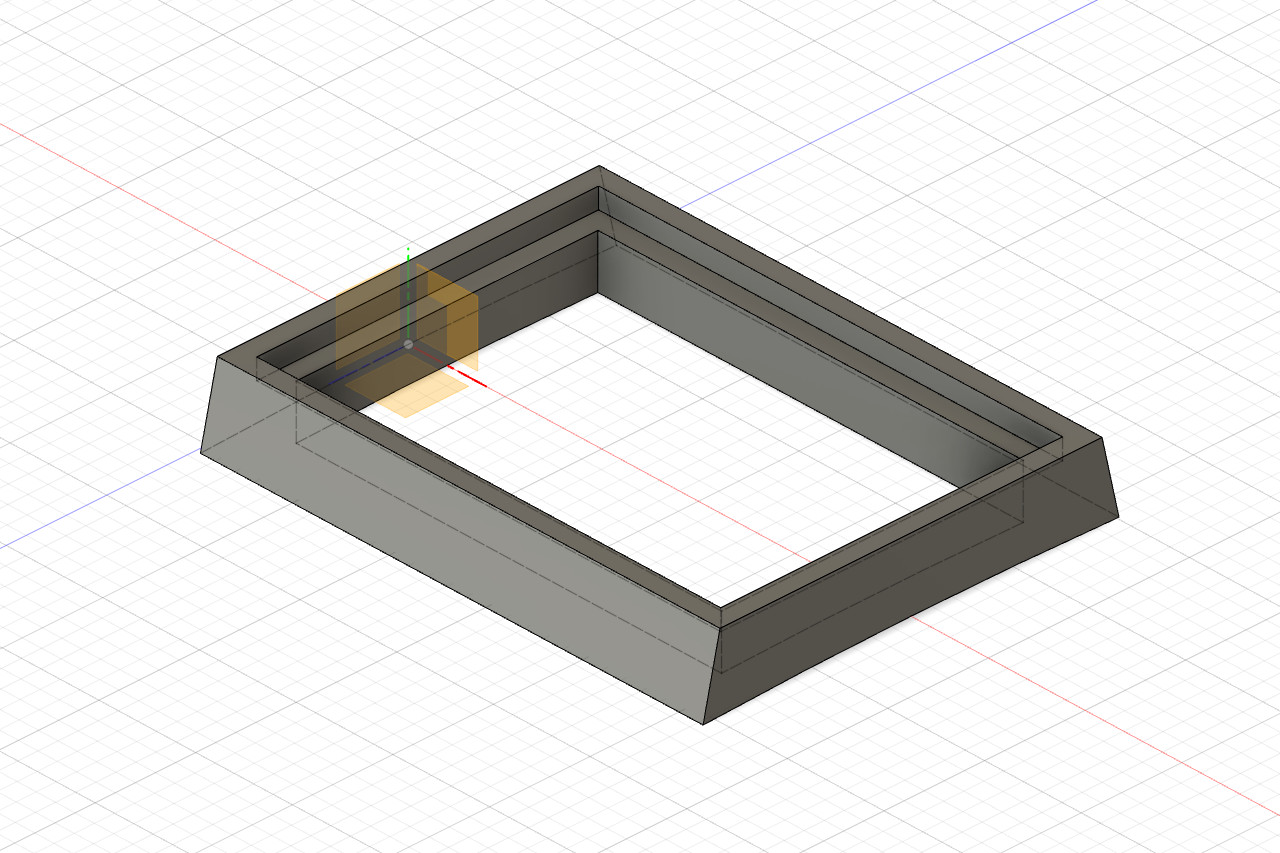
Next is the hatch coaming. From my earlier work, I already knew the exact curvature of the deck camber.
From there, I created the profile of the coaming.

And then the profile was extruded.
I created a new sketch on the coaming surface to indicate where the recess is.
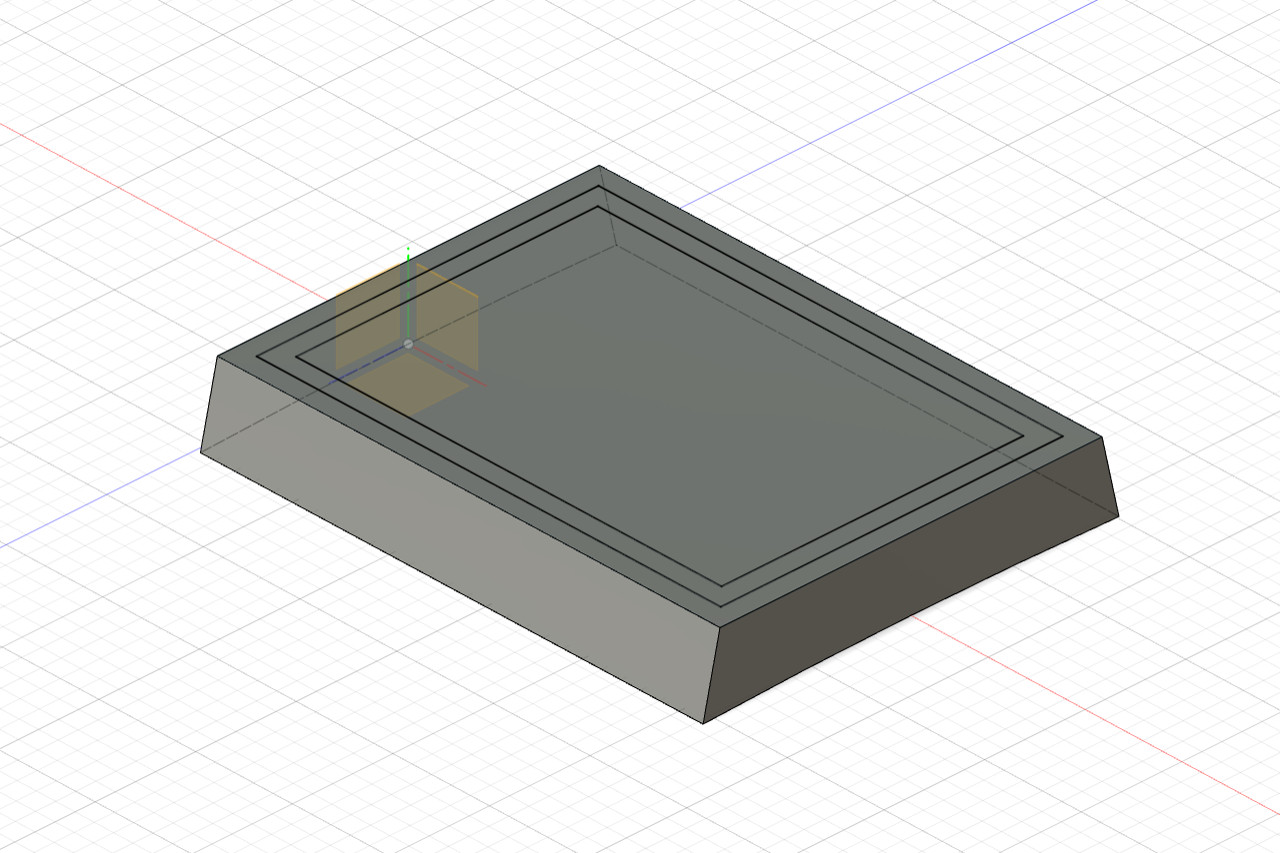
And the relevant parts were cut out.
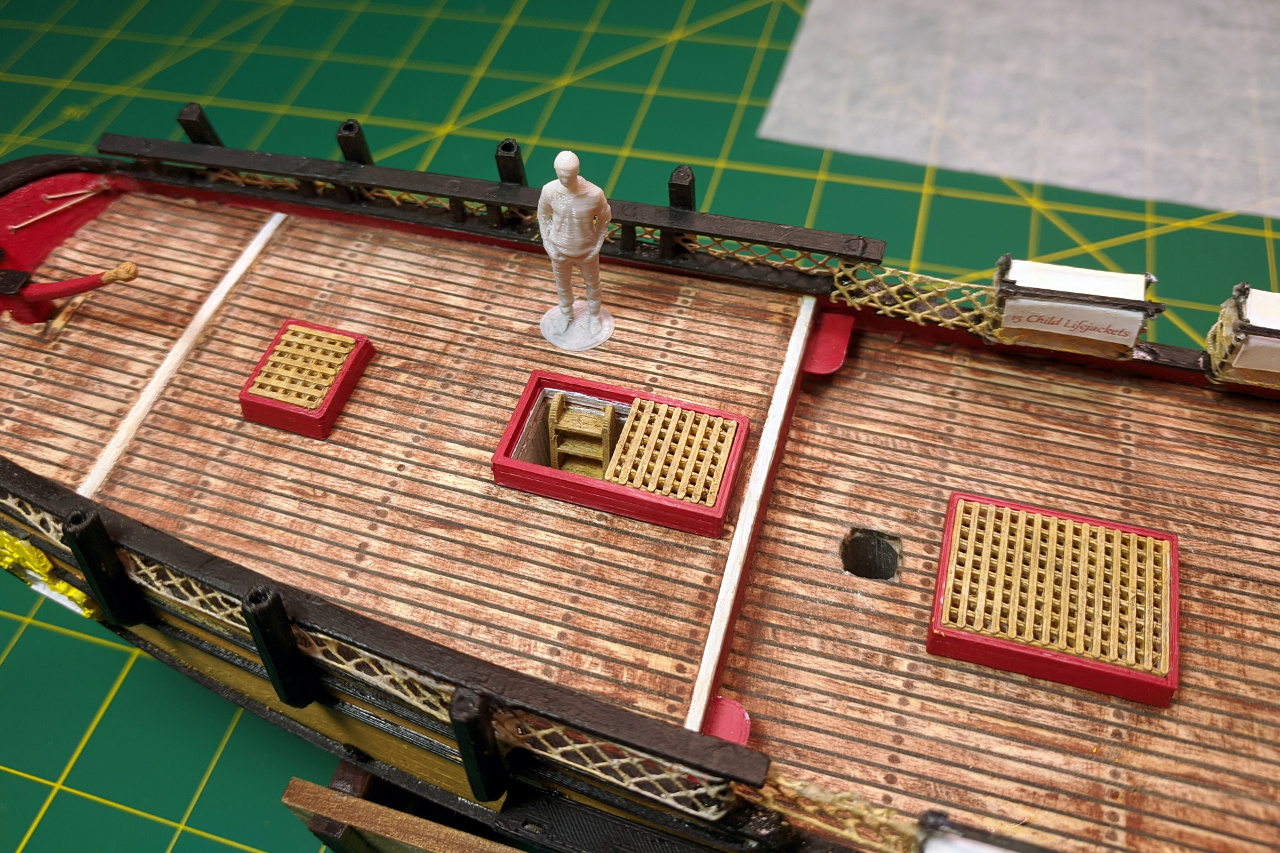
After 3D printing and painting, here are my final hatches.
And here are the hatches on the model. The aft-most small hatch hasn’t been glued down yet, because I need to place the binnacle first, then glue the hatch an appropriate distance from the binnacle.