Several bulkheads were added at the center of the ship. Because little to no fairing will be required, no fairing lines were identified for these bulkheads.
A place for everything else
Several bulkheads were added at the center of the ship. Because little to no fairing will be required, no fairing lines were identified for these bulkheads.
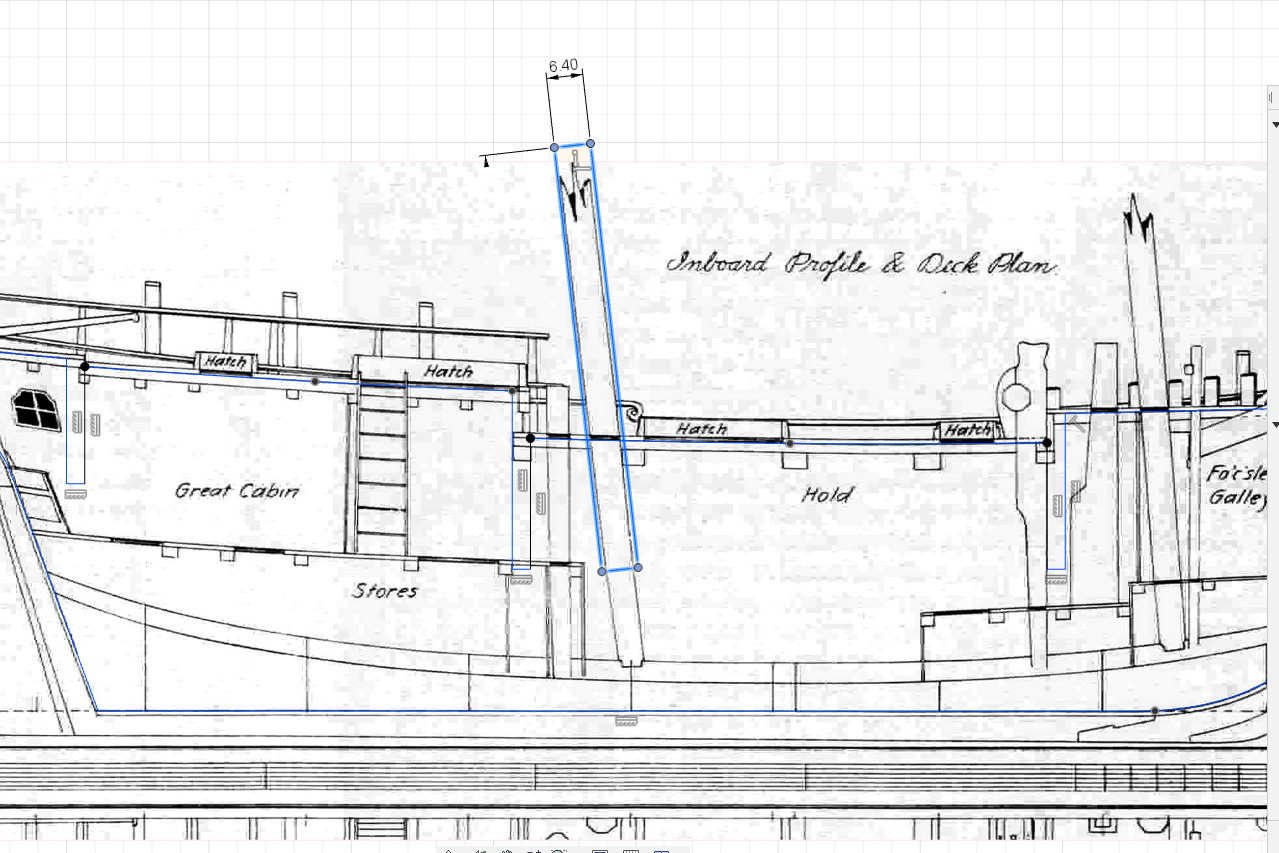
Before I add any more bulkheads, I think it’s a good time to cut out the notches for the masts and bowsprit. The kit-supplied dowels are 6.4mm in diameter for the masts and 5.15mm in diameter for the bowsprit. Tapering will be required above the deck, but I’m happy to leave them at full diameter within the hull.
I edit the sketch for the false keel. Rectangles are added with a width equal to the diameter of the dowel, then rotated and moved in position to line up with the masts on the inboard profile image.
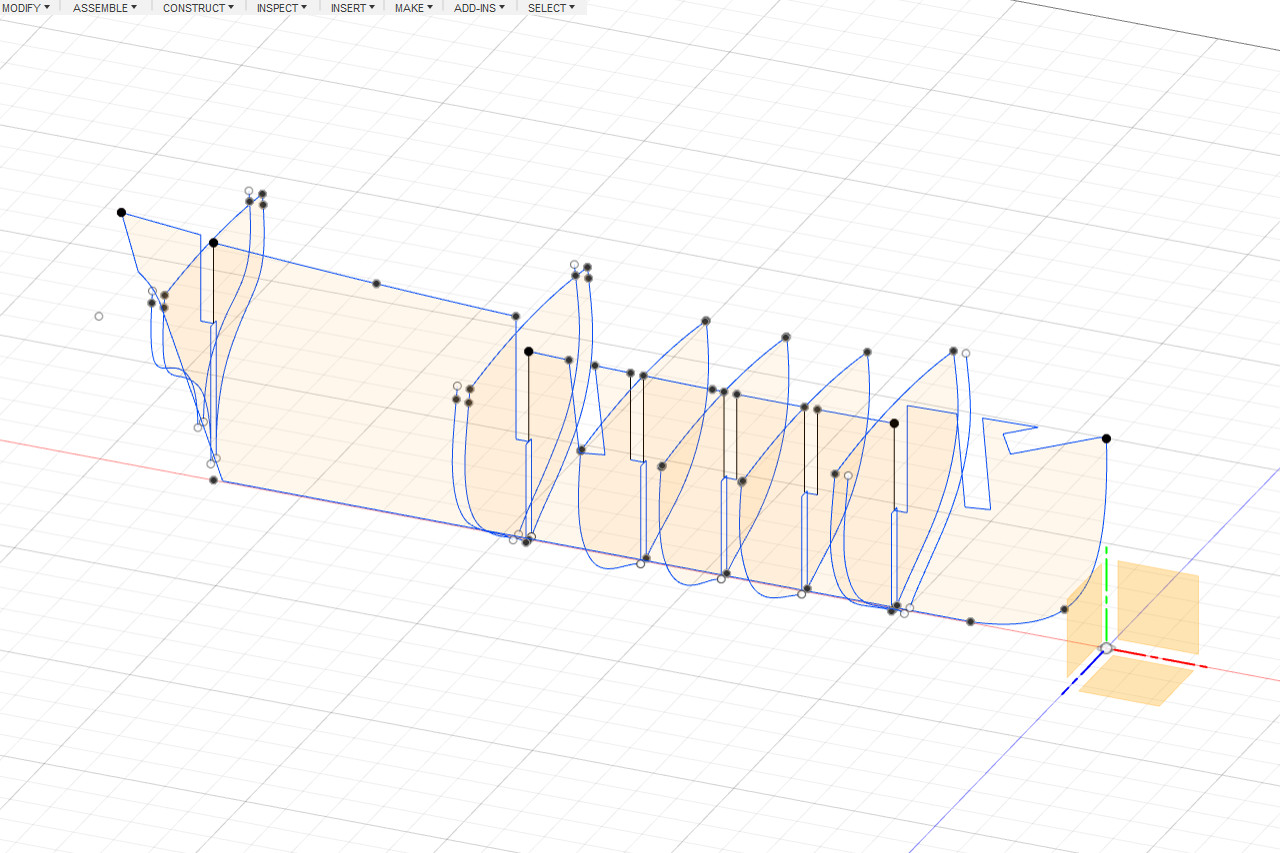
Finally I will start to find the shapes for some bulkheads. I know that I will want bulkheads at the three points where the deck level changes, so those seem like good ones to start with.
I start by making the inboard profile image visible, since it shows the internal structure. Via the construction menu, I create an offset plane at the point where the forecastle deck drops down to the main deck. It’s 52.7 mm back from the forward perpendicular.

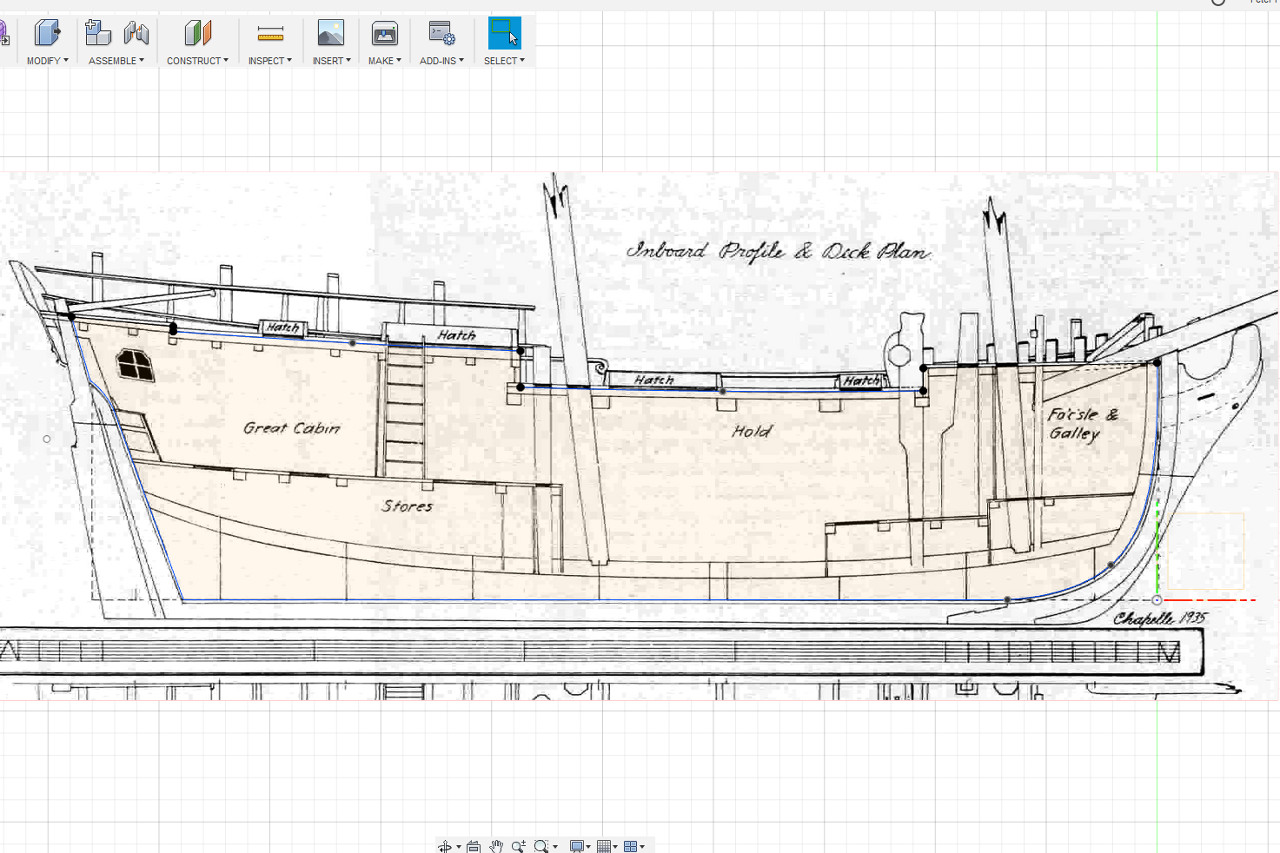
The next thing I need to figure out is the exact placement of the decks and the deck camber. I bring up the inboard profile image. Starting a sketch in the centerline plane, I trace the lines along the underside of the planking on each deck. The lines for the two innermost decks (main deck? and quarter deck?) are very slightly curved. The other two are just straight lines. The sketch continues alone the rabbet and back to the start. I’ll be using this sketch for the false keel laser cut piece. Notches for bulkheads will be added to it later.
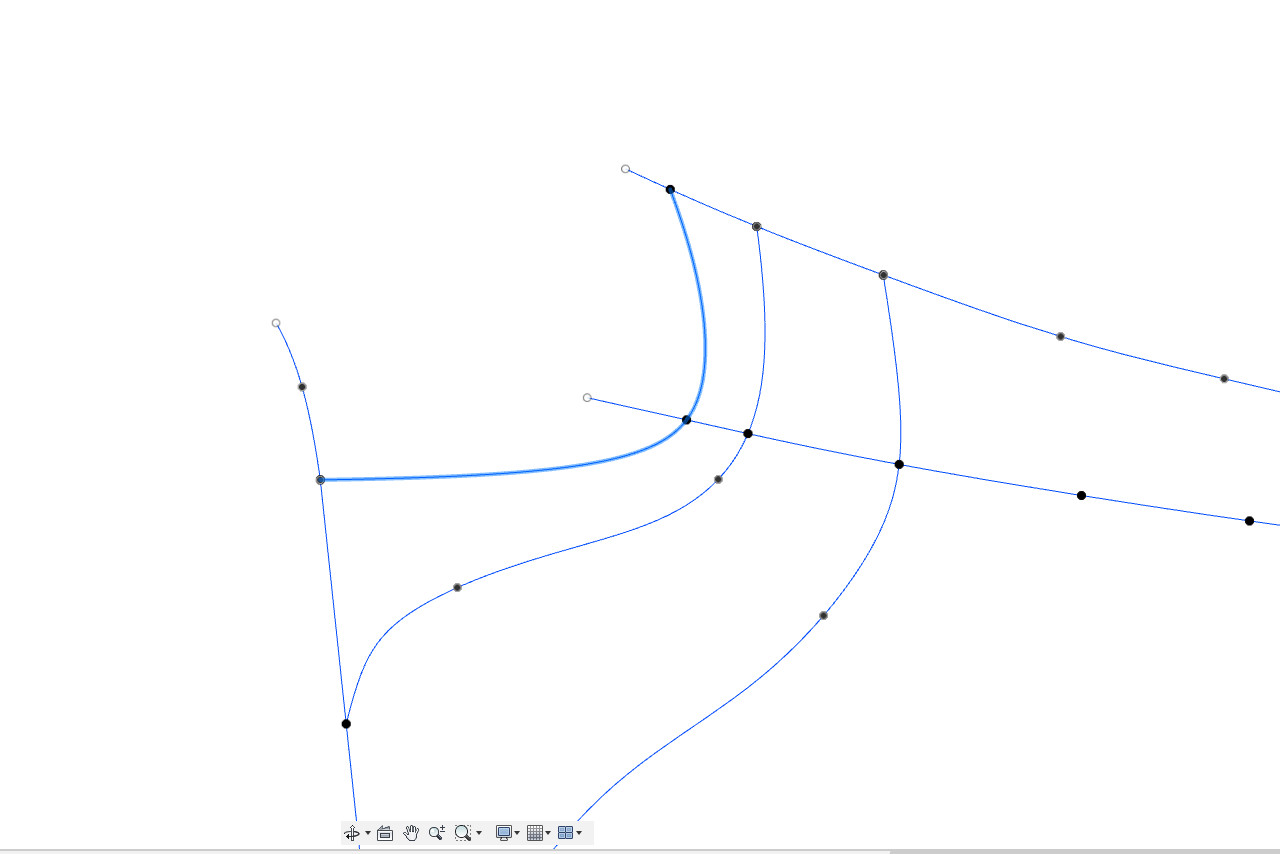
In order to establish a good ending shape for the hull, I added one more curve at the stern. This is a little guesswork since it isn’t a line on the plans, but I think the shape is pretty close.